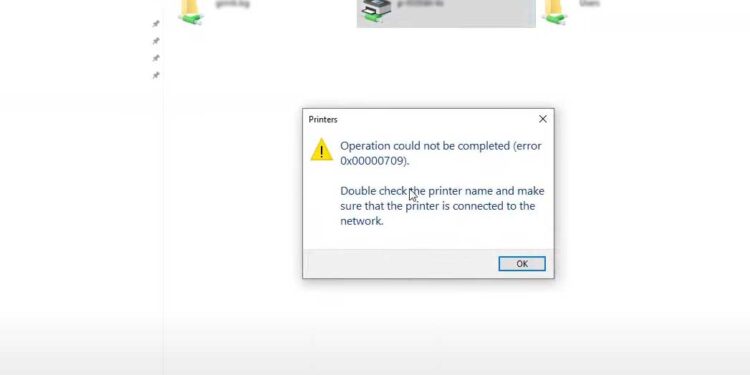
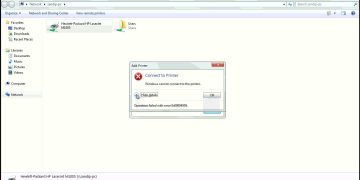
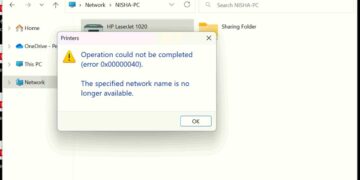
Many users have complained that they occasionally encounter the “Printer Error 0x00000709” when attempting to connect a shared printer or set a printer as the default one. “Operation could not be completed,” reads the error message. If the error occurs, it means that your windows have been updated recently. After updating Windows 11 to version 22H2 or version 23H2, your network printers may stop working. Also, error code 0x00000bc4 (Desc: ERROR_PRINTER_NOT_FOUND) or error 0x00000709 (Desc: ERROR_INVALID_PRINTER_NAME) appear when adding a new network printer.
One of the most annoying printer problems is when the printer won’t install or configure itself on your computer. Error code 0x00000709 is one that it frequently produces when there are configuration problems. If a default printer has already been set up and configured or if Windows refuses to configure the new printer at all, this will happen.
Follow the instructions in this article to resolve the issue if you are unable to add a shared printer or change your default printer and receive the message “Operation could not be completed (error 0x00000709)”. You don’t need to choose a printer every time you want to print because all print jobs are automatically sent to the default printer when you set one up. However, Windows may fail to change the default printer and show the 0x00000709 error in some cases.
Operation could not be completed (error 0x00000709). Double check the printer name and make sure that the printer is connected to the network.

Cause of Printer Error 0x00000709
This error typically appears when you attempt to make a new or outdated printer your default. As soon as the printer is connected, a pop-up window appears and displays the message “Printer Error 0x00000709 (Operation could not be Completed)”.
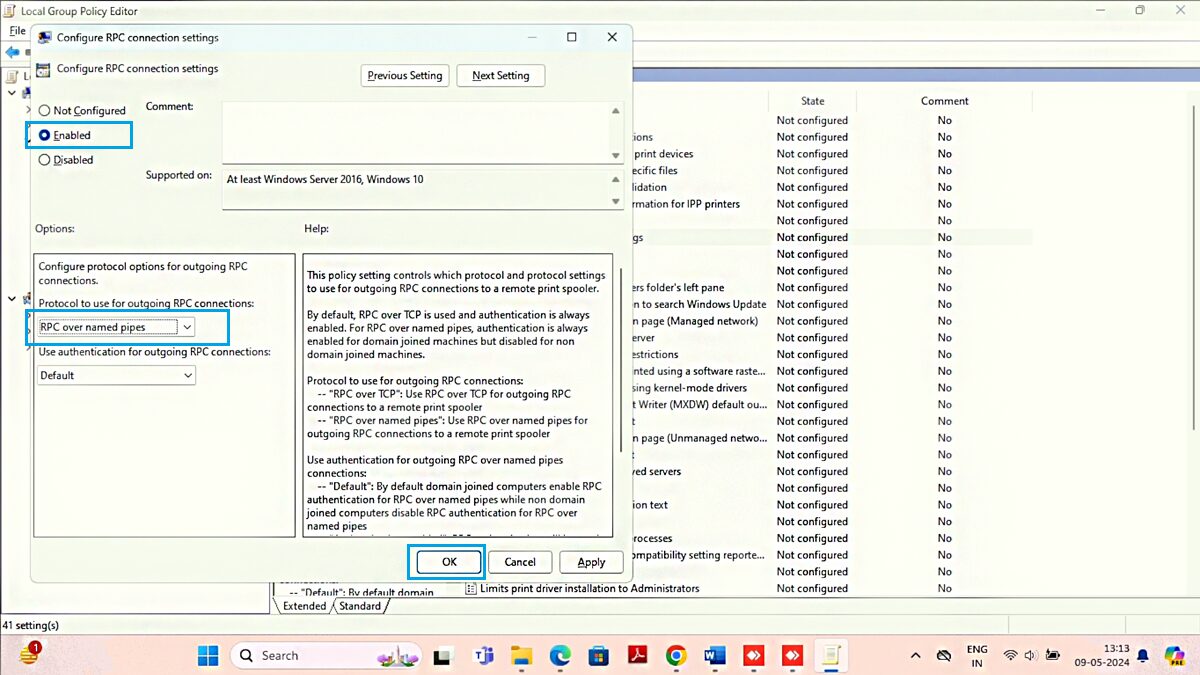
A new group policy with the name “Configure RPC Connection settings” was added to Windows 11 version 22H2 or 23H2. This policy setting determines which protocol and protocol options to use for outgoing RPC connections to a remote print spooler. By default, 22H2 prevents Windows from discovering your network printers. Your current printers are deleted as a result, and manually adding them results in the error 0x00000709.
How to Fix Printer Error 0x00000709 on Windows 10/11
The error code 0x00000709 typically appears when a system file is corrupted, the printer name is incorrect, or there is a problem with the registry settings. The majority of users first encountered this error after installing Windows Updates designed to fix the PrintNightmare vulnerability in the print spooler service. Incompatible drivers were one of the causes, as well as improperly configured communication protocols.
The solution will also differ depending on what specifically caused this error in your case. As a result, in order to rule out any possibilities, we advise attempting the fixes in the order provided here.
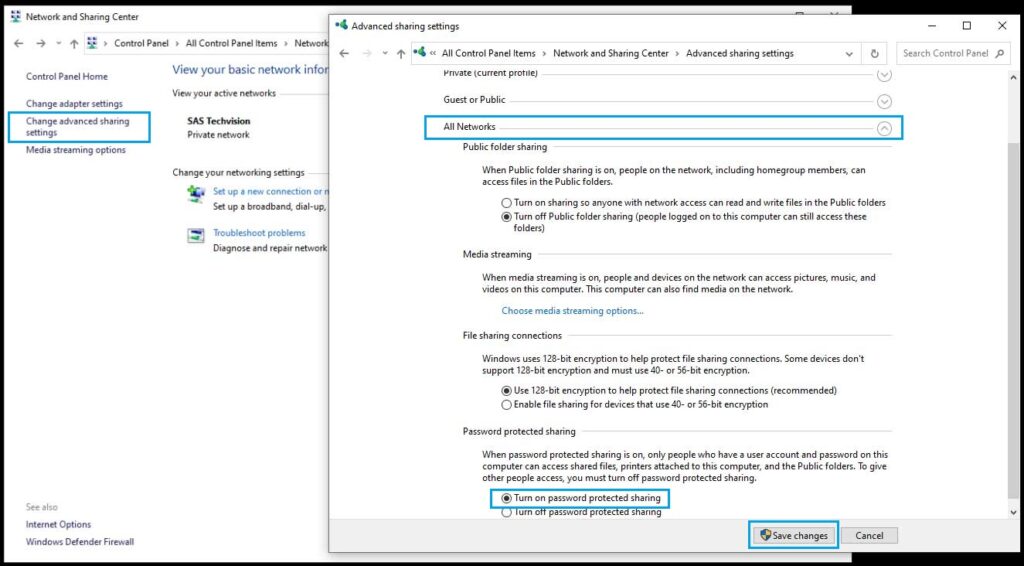
1. Turn on Password Protected sharing
This method is very easy and one of the most effective methods to fix the 0x00000709 printer error. Because after installing the Windows update, a print server cannot be installed with signed or unsigned printer drivers by non-administrators, including delegated admin groups like printer operators. Only administrator credentials will be required to install signed and unsigned printer drivers on a printer server. So set a password on your existing user and turn on Password protected sharing.
- Press Windows + R to open Run Box.
- Type Control and Hit Enter.
- The Control Panel page will open after running this command.
- Search the Network and Sharing Center on this page and open it.
- Now, in the left pane find the Change advanced sharing setting and open it.
- Search for All Networks and expand it.
- Here, you will see the Password protected sharing and then click the radio button Turn on Password protected sharing and save changes.
2. Use Group Policy Editor to Fix error 0x00000709 in Windows 11
After applying the updates described above, some users have received error 0x00000709 because the wrong protocol settings were used for outgoing RPC connections to the remote spooler. In this case, you can apply corrections to your workstation:( Note:- This step only works in Windows 11)
- Launch Run Box Pressing Windows + R Button together.
- Type the
gpedit.msccommand in the run box and hit Enter. - Navigate the following path.
Computer Configuration > Administrative Templates > Printers.
- Find the Configure RPC connection Settings.
- Double-click the Configure RPC connection settings policy.
- Set it to Enabled. Then, select RPC over named pipes with Default and press Ok to save the changes.
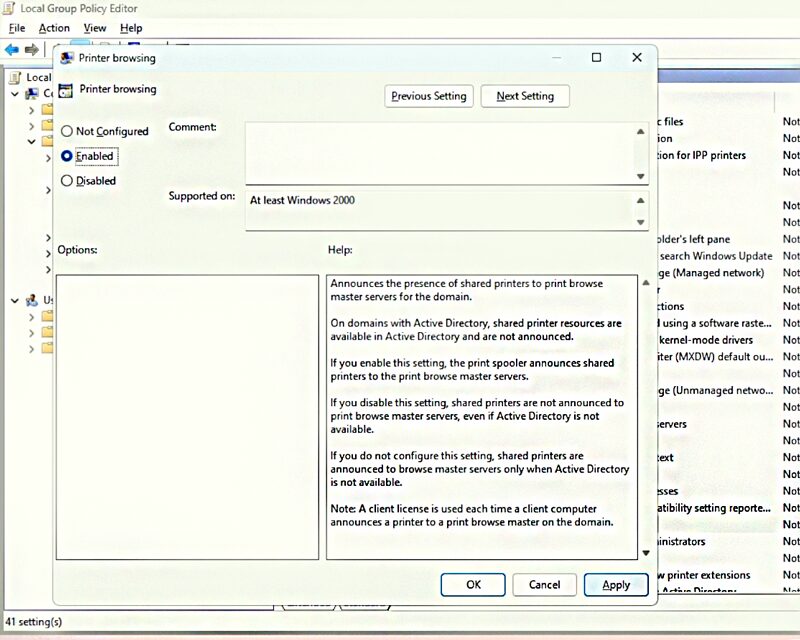
- Find the Printer browsing.
- Double-click the Printer browsing policy.
- Set it to Enabled.
- Press Ok to save the changes.
After completing the above steps, Restart your computer or Restart Print spooler service and then try to connect your share printer. In some cases, printer error 0x00000709 can be caused by a problem with the printer spooler service. To fix this, open the Services app on your computer (you can find it by searching for “Services” in the Start menu), then find the “Print Spooler” service and right-click on it. Select “Restart” and try printing again.
3. Fix Share Printing Error 0x00000709 Using Registry
Due to a bug in the registry settings, this printer error 0x00000709 occurs. The registry keys prevent you from making the current driver the default printer driver and prioritizing the previous printer driver. It frequently occurs in Windows 7, 8, and 10 operating systems. If you encounter this error, don’t worry. A few changes in the settings or in the registry will fix the situation. Just follow the steps we will give you.
Before changing the registry setting you should take a backup of your registry then you have to find the OS Build Version. To know os build version go to system properties using this path Start button>Settings>System> About. You can see the OS build Version below the Image.

Now, you can use the following step to change the registry.
- launch the start menu search, and type CMD to open Command Prompt.
- Now, open Command Prompt as administrator.
- Run the following command (change your OS Build Version which is denoted as V).
- Close the Command Prompt and restart your PC.
- Here, we show you some examples of commands as per OS Build.
1. Windows 10 v22H2:
reg add HKEY_LOCAL_MACHINE\SYSTEM\CurrentControlSet\Policies\Microsoft\FeatureManagement\Overrides /v 190452728 /t REG_DWORD /d 0 /f2. Windows 10 versions 2004, 20H2, 21H1, and 21H2:
reg add HKEY_LOCAL_MACHINE\SYSTEM\CurrentControlSet\Policies\Microsoft\FeatureManagement\Overrides /v 713073804 /t REG_DWORD /d 0 /f3. Windows 10 v1909:
reg add HKEY_LOCAL_MACHINE\SYSTEM\CurrentControlSet\Policies\Microsoft\FeatureManagement\Overrides /v 1921033356 /t REG_DWORD /d 0 /f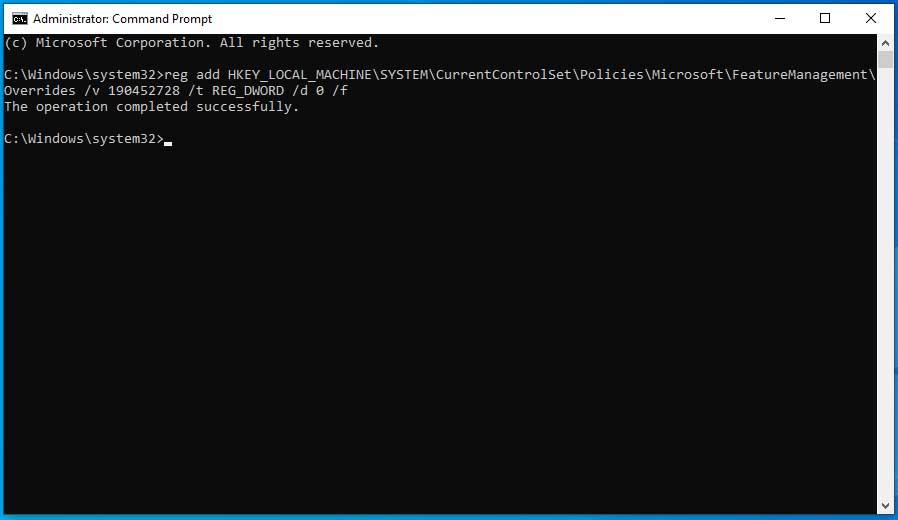
Also Read:
- How to Fix Error Code 0xc0000017 in Windows 10
- Reset 120 day RDS Grace period using Registry on Windows Server
4. Overriding Printer Installation Restrictions
Windows updates released on August 10, 2021, and later, by default, will only require administrator credentials to install signed and unsigned drivers on print servers. To fix this printer error 0x00000709 problem and allow users to install network drivers, follow the following:
- launch the start menu search, and type CMD to open Command Prompt.
- Now, open Command Prompt as administrator.
- Run the following command in CMD.
reg add "HKEY_LOCAL_MACHINE\Software\Policies\Microsoft\Windows NT\Printers\PointAndPrint" /v RestrictDriverInstallationToAdministrators /t REG_DWORD /d 0 /f
- Restart your PC and install the network Printer.
If you want to revert this setting after adding the network printer, you can run the following command using the above step.
reg add "HKEY_LOCAL_MACHINE\Software\Policies\Microsoft\Windows NT\Printers\PointAndPrint" /v RestrictDriverInstallationToAdministrators /t REG_DWORD /d 1 /f5. Uninstall Recent Windows Update
Sometimes Windows Updates can cause errors on your device. If you encounter Printer Error 0x00000709 after updating your Windows to the latest version, uninstall the update. The latest update may be the cause of the error. Try uninstalling the most recent cumulative update and security update if you are encountering error 0x00000709 while configuring your printer on Windows 11/10. You could fix this error in such cases by uninstalling the problematic update.
- Press Windows + R to open Run Box.
- Type Control and Hit Enter.
- The Control Panel page will open after running this command.
- Search the Program and Features on this page and open it.
- In the left pane click on View installed updates.
- Right-click on recent updates and Uninstall.

Video Reference
In conclusion
Shared printer error 0x00000709 in Windows 11 can be a frustrating problem, but there are some steps you can take to fix the problem. First, make sure the printer is connected and turned on properly, then try to update the printer driver and Windows 11. If these steps do not work, try restarting the Print Spooler service or emptying the print queue. If all else fails, try disconnecting and reconnecting the printer or check for network/firewall issues. With a little patience and persistence, you can get your printer working again.

