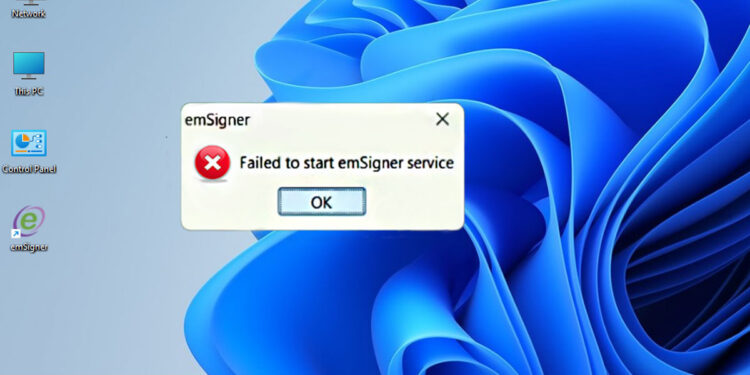
If you receive the error “Failed to start emSigner service” when you try to submit an application using DSC to MCA, the service is probably not installed or running. Also, the error may occur due to a lack of permission or conflict with your installed antivirus.
As an MCA emSigner user, you may have encountered the “emSigner Service Failed” error at some point. This error can be frustrating, especially when you need to sign important documents. However, you can follow a few simple steps to fix this error and get the emSigner service up and running again.
According to reports from other users, the issue of emSigner not working or emSigner service not starting is not new but seems common. The problem is believed to be related to compatibility issues, as these errors usually occur when other applications are installed or the system is not functioning properly compared to the current third-party plan.
What to do to fix the Failed to start emSigner Service error?
EmSigner is a digital signature solution that allows organizations to sign and verify documents. It is widely used in industries such as banking, insurance, healthcare, and government to improve data efficiency, reduce paper consumption, and improve security and tracking. However, like any software, emSigner may encounter glitches or issues that prevent it from working properly. A common problem is that emSigner cannot be started. This article explains some possible causes and solutions for this problem “Failed to start emSigner Service”.
1. Run Compatibility Troubleshooter
The Compatibility Troubleshooter is a tool that helps you run older programs on newer versions of Windows. This tool can help you identify compatibility issues of the emSigner error “Failed to start emSigner Service” and adjust settings so the program can work properly. Here’s how to use the Compatibility Troubleshooter:
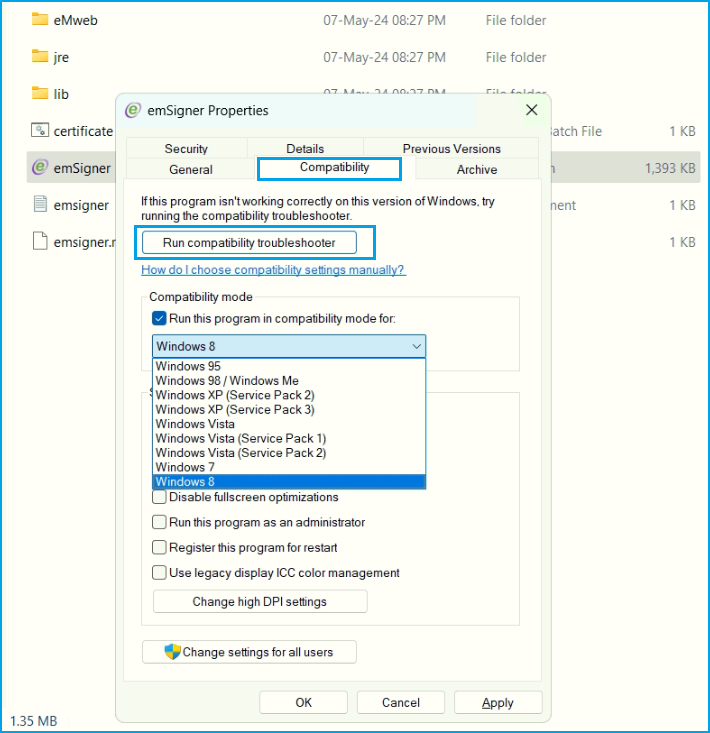
- Right-click on the emSigner application and select “Properties“
- The Properties page will open, click on the “Compatibility” tab.
- In the Compatibility tab, Select the earlier operating system and press the “Run Compatibility Troubleshooter” Button (See below image).
- The Compatibility Troubleshooter will ask you if the program ran correctly on an earlier version of Windows. Select “Yes” or “No” depending on your answer.
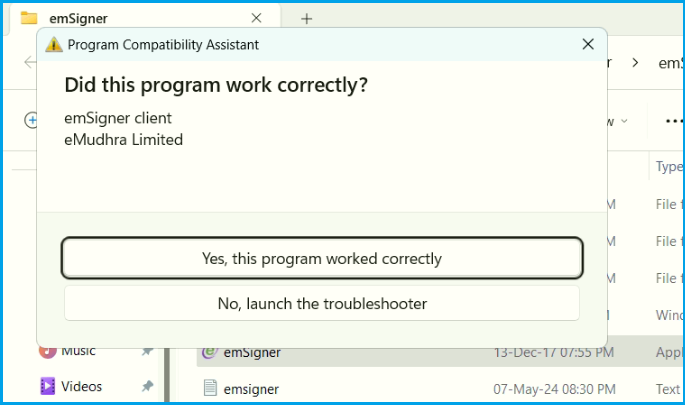
- If you select “No,” the troubleshooter will prompt you to choose an earlier version of Windows to simulate. Choose the most recent version that you know the program worked on.
- The troubleshooter will then ask you to test the program by running it. If the program runs correctly, select “Yes, save these settings for this program” and you’re done (See below Image).
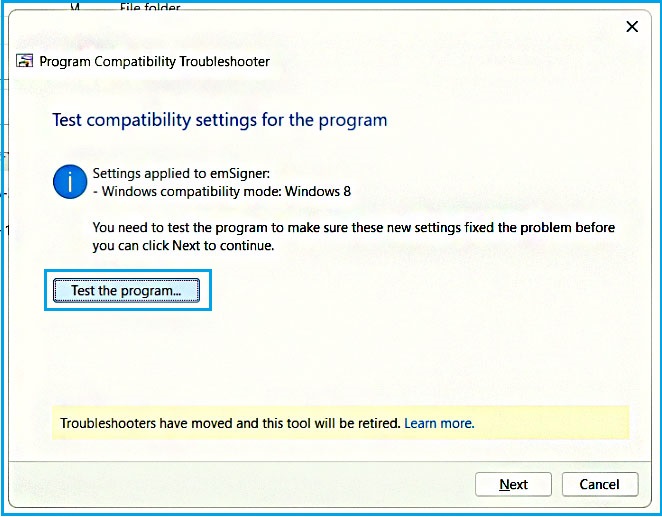
- If the program still doesn’t work, select “No, try again using different settings.” The troubleshooter will then present you with a list of options that you can adjust to try and make the program run correctly.
- Try running the program again, and if it works correctly, select “Yes, save these settings for this program” and you’re done.
Using the Compatibility Troubleshooter can help prevent the failure to start emSigner Service. However, it is important to note that not all programs will work with this tool. If the problem persists after using the troubleshooter, you may need to try another method from this article.
Also Read:-
- Remote Connection Fails Because of a Security Error on RDP
- How to Fix RDP Error “An authentication error has occurred”
2. Uninstall and Install emSigner Application
Uninstalling and installing apps can be a difficult task, especially if you are not familiar with technology. However, the process can be simple if you follow the instructions correctly. This method shows you how to uninstall and install the emSigner app.
Uninstall emSigner Websocket
- Press Windows + R Key to open Run Dialog Box.
- Type
control paneland press OK to Open the Control Panel. - Find the Programs and Features and open it.
- Search the emSigner app, Right-click on emSigner, and select “Uninstall.“
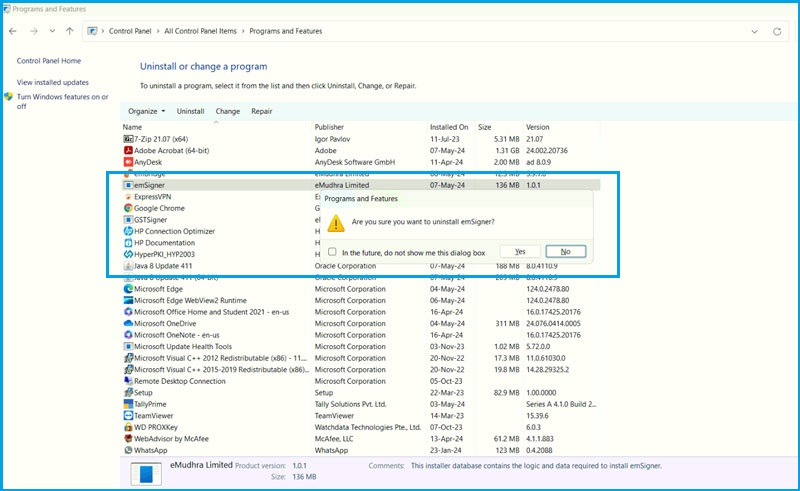
Follow the prompts to complete the uninstallation process. Once the process is complete, you can delete any remaining files and folders related to the application.
Install emSigner Websocket
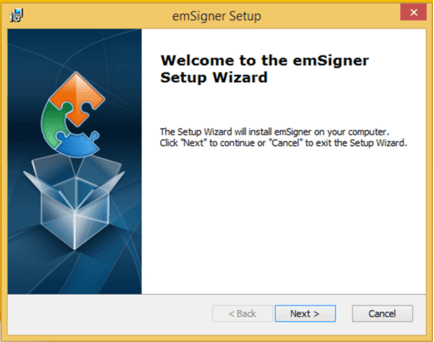
To install the emSigner app, make sure you have downloaded the latest version from the MCA website. If you don’t have it, download emSigner from the official website. To install the app, follow these steps:
- Double-click on the downloaded setup file.
- Click on “Run” to start the installation process.
- Select the installation path and click “Next.”
- Accept the terms and conditions and click “Next.”
- Click “Install” to start the installation process.
- Wait for the installation process to complete.
- Click “Finish” to complete the installation process.
3. Install the Latest Version of Java to fix Failed to start emSigner Service error
Java is an essential programming language for running many applications, including emSigner, a digital signature software. Older versions of Java may cause compatibility issues with emSigner, resulting in the “Failed to start emSigner Service” error. To fix this error, follow these steps to install the latest version of Java:
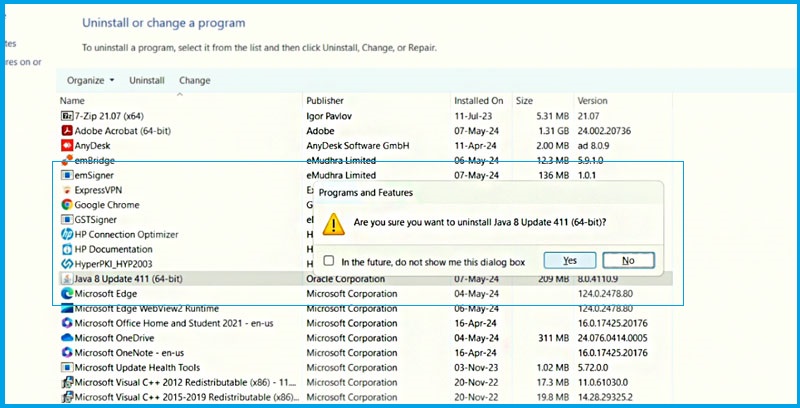
Uninstall old Java versions
Before installing the latest version of Java, you need to uninstall any old versions that may be present on your system. To do this, go to the Control Panel on your Windows computer and select “Programs and Features.” Find any Java applications listed and uninstall them.
Download the latest version of Java
Once you have uninstalled old versions of Java, you can download the latest version from the official Java website. Make sure to download the appropriate version for your operating system.
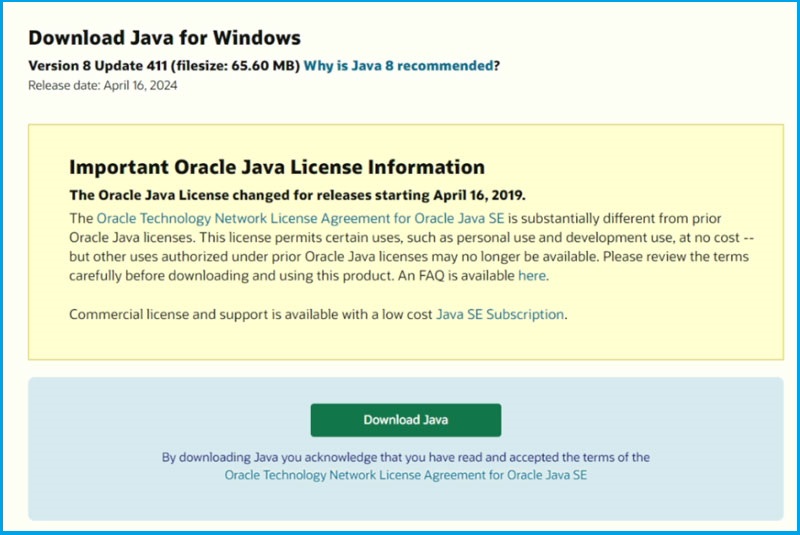
Install Java
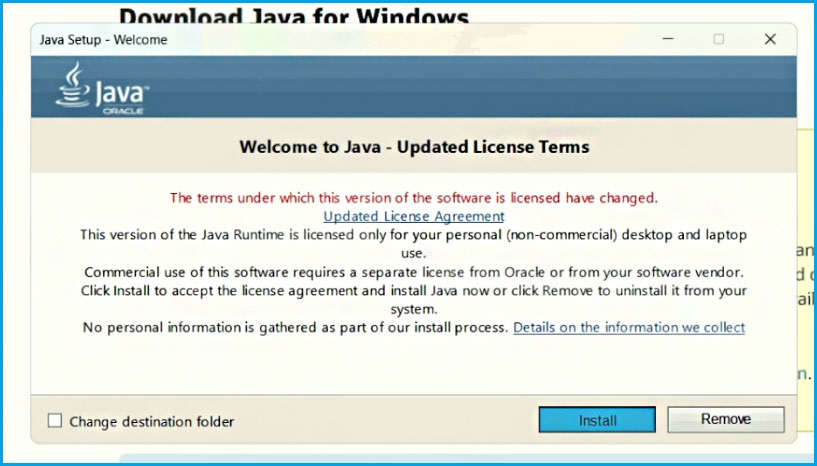
After downloading the latest version of Java, run the installation file and follow the prompts to complete the installation. You may need to restart your computer after the installation process is complete.
Also Read These:-
- How to Fix the Microsoft Store Error 0x800704CF in Win 11 and 10
- Fix 0x800F0950 .NET Framework 3.5 installation Error – Win 11/10
4. Uninstall Programs That use Port 2015
if you’re experiencing “Failed to start emSigner Service” issues with using MCA emSigner, one of the first things you should check is whether port 2015 is open and accessible. If it’s not, you may need to configure your firewall or network settings to allow for communication through this port.
Why is port 2015 important for MCA emSigner? Well, this port is specifically used by MCA emSigner and is required for the proper functioning of the solution. Without it, emSigner would not be able to communicate with the server, which would render the solution unusable.
To check which programs are using Port 2015, you can use a tool such as the Command Prompt on Windows. You can follow the following steps to check the list of programs currently using Port 2015.
- Press the Windows + R Key to open the Run Dialog Box.
- Type
cmdand hit Ctrl + Shift +Enter to open Command Prompt as Administrator. - Type the
netstat -abnin the Command Prompt and hit Enter. This will display the list of programs currently using Port 2015.
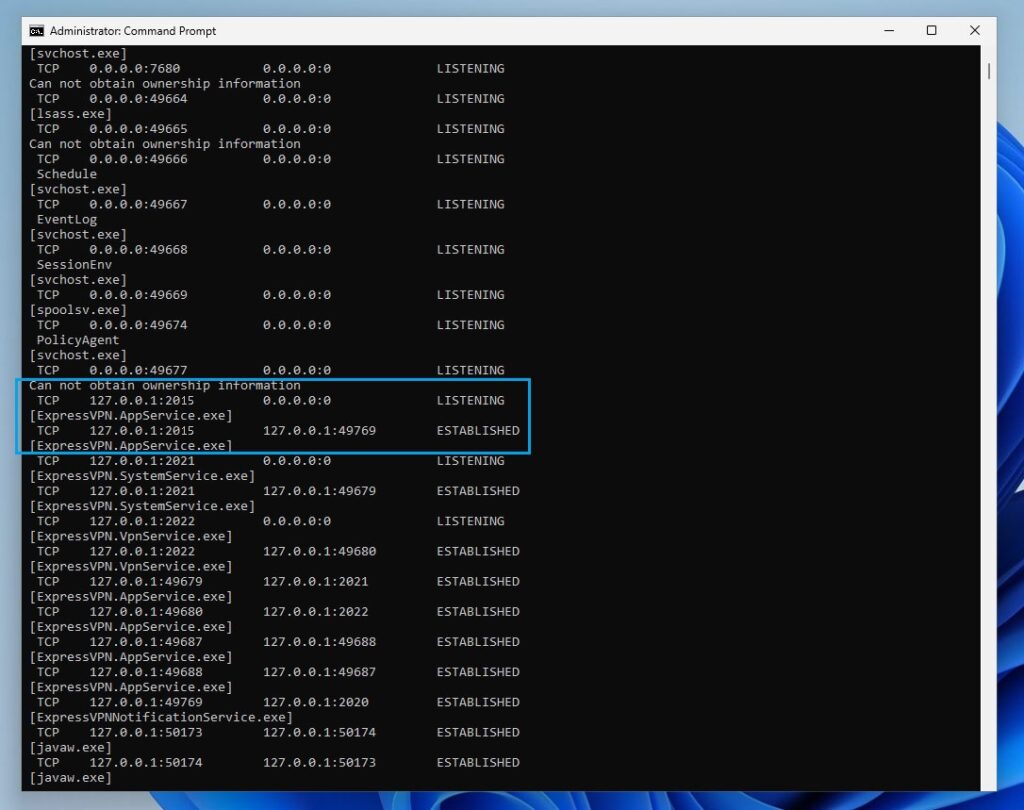
If you notice any unfamiliar programs using this port, it’s best to uninstall them immediately. You can do this by going to your device’s control panel and selecting “Programs and Features“. From there, simply select the program you want to uninstall and follow the prompts to remove it from your device.
Video Guide on How to fix Failed to start emSigner Service error
By following these simple steps, you can fix the “Failed to start emSigner Service” error and use digital signatures without any issues. It’s important to keep Java updated to avoid any compatibility issues with other applications as well.
Conclusion
the “Failed to start emSigner Service” error can be frustrating, but it is fixable. Follow the steps mentioned in this article, and you should be able to resolve the error. If you continue to see the emSigner service fails to start error, we recommend waiting 24-48 hours or submitting to MCA earlier in the day to reduce server downtime or contact MCA support for further assistance.

